

Looking to add a sprinkle of storybook magic to your next party or celebration? This Peter Rabbit scarecrow DIY brings Beatrix Potter’s beloved bunny, “cwningen” in Welsh, right to your table. Whether you’re planning a baby shower, Easter brunch, or garden party, this no sew craft makes a delightful centrepiece. Add a playful nod to Peter’s favourite snacks with a few Welsh veggies like carrots, leeks, or cabbages. Download the free printable blue jacket template and follow these easy steps, no sewing required, just a little imagination and a dash of Welsh whimsy!
🕒 Time to read: 3 minutes


I first made this little scarecrow for a Peter Rabbit baby shower, and it completely stole the show! Think Mr. McGregor’s garden, but cuter and without the grumpy gardener. You can peek at that party setup here, but for now, let’s get crafting.


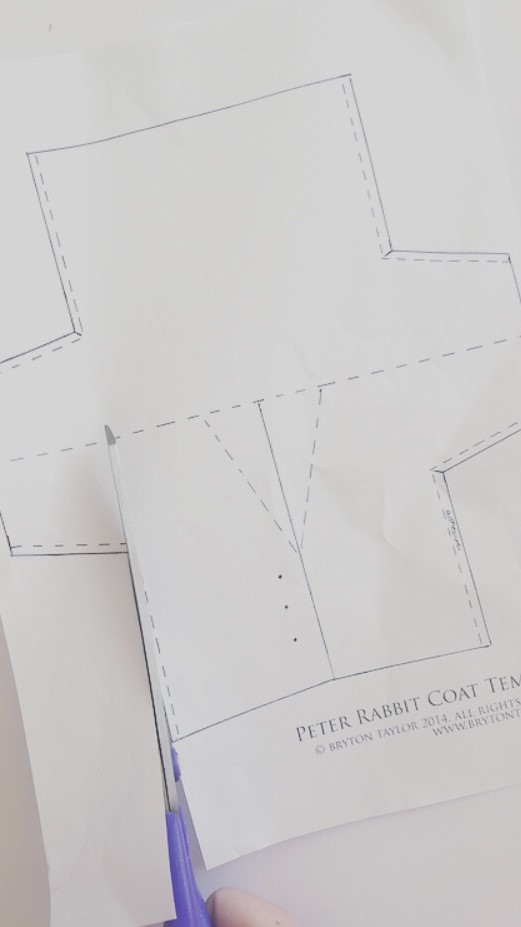
Peter Rabbit Coat Template
Want to skip the guesswork and get straight to the fun part? I’ve got you covered! Here is a ready to use Peter Rabbit coat template to help you craft the perfect little blue jacket for your scarecrow.
Just download, print, and trace onto felt, it’s that easy. Whether you’re a seasoned crafter or just winging it with a glue stick and good intentions, this template will make your life a whole lot easier.
Peter Rabbit Coat Template – Download
What you’ll Need
- Scissors
- Pencil
- A4 Peter Rabbit coat template
- Blue felt
- Glue (fabric glue works best)
- 3 gold buttons
- Wooden sticks
- Elastic band
- Optional: craft foam, mini bucket, artificial grass, leaves, pinecones, flowers

Instructions
1. Cut out your coat template
Start with your paper template. This will be the shape of Peter’s iconic little blue jacket.
2. Trace it onto blue felt
Use your pencil to lightly trace the template onto the felt. Felt is great because it holds its shape and gives that soft, storybook look.

3. Cut and fold
Snip out the felt shape and fold it over like a real jacket. You’re already halfway to adorable.

4. Glue and button up
Glue the sides marked “adhesive” and press them together. Then, add three gold buttons down the front. Voilà! Peter’s jacket is ready for action.

5. Build your scarecrow frame
Cross two wooden sticks and secure them with an elastic band. This is your scarecrow’s “body.”


6. Stand him up
Pop the stick frame into a block of craft foam. You can hide the foam in a mini bucket or cover it with faux grass for that garden feel.

7. Add the finishing touches
Scatter some leaves, pinecones, and flowers around the base. Maybe even a tiny carrot or two if you’re feeling extra!

Where to Show it Off
- On a sweet table surrounded by cupcakes and carrot cake
- As a centrepiece for your party table
- In a mini garden scene with toy veggies and bunny footprints
- Near the entrance to welcome guests with a smile

Final Thoughts
It might be small, but it brings big charm to the party, just goes to show, the magic really is in those thoughtful little details.
Have you made your own Peter Rabbit scarecrow or styled a Beatrix Potter party? I’d love to see it! Share your photos or tips in the comments or tag me on socials. And if you enjoyed this post, don’t forget to like, share, and subscribe for more party magic.

thank you for the free pattern. It’s adorable. And so easy. I’m making w felt. Will try w cotton fabric too. I’m using it for my daughter’s baby shower. Peter Rabbit theme. I appreciate you sharing it with us 🤗Cynthia
LikeLiked by 1 person
Thank you for your comment. I hope you and your daughter have a wonderful time at the baby shower <3
LikeLike